I'm very excited to finally share my sewing area. I wanted to wait until I finished the skirt to hide the less-than-organized area under my table. I'll show you that in just a moment. Without further adieu.
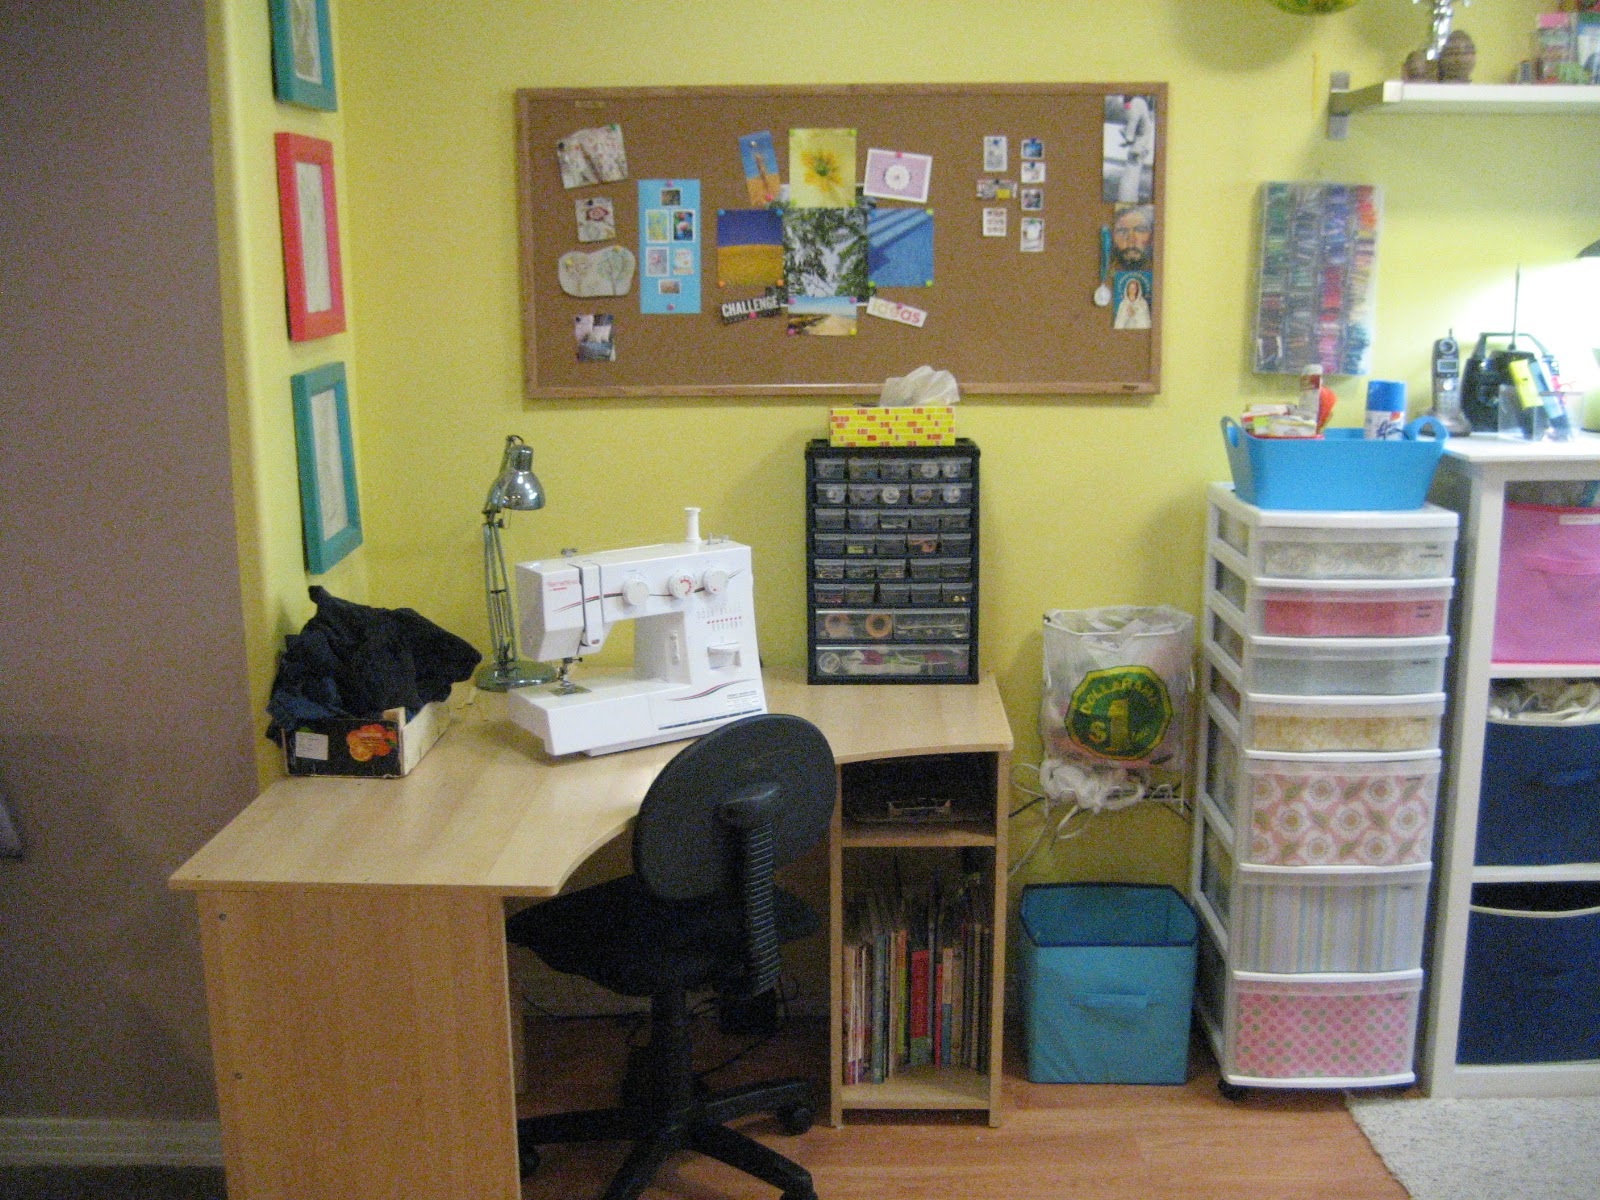
It's located in the basement. We have a few half windows that cast some light. When we first moved in, the wall colour was a dreary Vampire Red (as least that's what I called it). I opted for a nice cheery yellow to really brighten the place up.
My sewing machine is located in the corner that kind of opens up to the play room so that I can keep an eye on the children at play. I wanted everything close-at-hand, so the garbage and recycling (blue box below) is well, close-at-hand. The cork board is my inspiration board that is in dire need of a make-over since it is less-than-inspiring at the moment. I have plans for that in the future. Oh, and that clementine box on the table is my mending bin. When it's overflowing (like it is) that means it's time to mend.
I keep my thread and other sewing accessories in this organizer you can find in the tool area at any hardware store. It's originally meant for sorting screws and such. But here is a closer look.
Mostly everything is labeled. I have the main spool of thread in front and the divider separates the bobbin with the same colour thread in the back.
These frames were thrifted and painted. They hold my drawings that I drew when I was in my pre-kid phase of life.
Now onto the trolley-cart plastic thingy. I vamped it up with some stylish scrapbook paper and of course labeled everything. Above that It holds my husbands Areo Garden stuff. And above that I have my embroidery thread.
Moving on shall we? Here is a bookshelf cubby bought off of Kijiji, also painted. It used to be brown. The Areo Garden is a nice addition because of the "natural light" look. Like one of them there mood lamps. If the yellow paint didn't getcha happy, the light sure will. So the cubbies hold, scrapbook paper, paint (not organized yet!) Stuffing, gift bags and of course fabric on bolts.
I decided to keep the smaller squares of fabric in a CD bookcase thing. Again from Kijiji.
I like to incorporated used clothing into some of my creations so when I receive hand-me-downs from others and my kids aren't too pleased with the choices I might scavenged them and cut up what I like. Here I have a collection of tee's and dresses cut up into usable pieces. The cotton and Linen are in the pink basket. I also have darks/jeans in one of the other baskets in the cubbies, and silky/specialty in another one.
Above, the cubby-bookcase I have a large shelf that holds, rick-rack, bias tape, lace pieces, ribbon and tape.
I really like my cutting and planning table. I love an open, clear table top! I hold my rotary cutters and scissors on a Dollar-store utensil-wall holder, right at my finger tips! Above that I have my buttons, pins and needles, as well as a jar to hold some small projects.
To the right of that I have my quilting rulers and ironing board. I also have some art on the wall to keep it fresh and inspiring.
Are you ready to see what's under the table skirt? Oh boy. Not so pretty, hence the skirt. I have large sheets ready to be ripped up for a rag-rug, the Silhouette and accesspries I'm borrowing and more fabric that I've cut up, ready to use. I also have some croissant containers that have been cleaned up and stores some unfinished projects I'm going to get to.
Lastly, behind this door which is the door to the furnace room, I keep extra supplies like Mod-Podge, glues, permanent markers, waaay out of reach of the kids, glue gun, pens, etc.
Well that's all folks. I hope you've enjoyed the tour. Be sure to come back and see what else I conjure up in my small castle.
Blessings,
Christina


